The Home of Homemade: Felt & Fabric Decorations
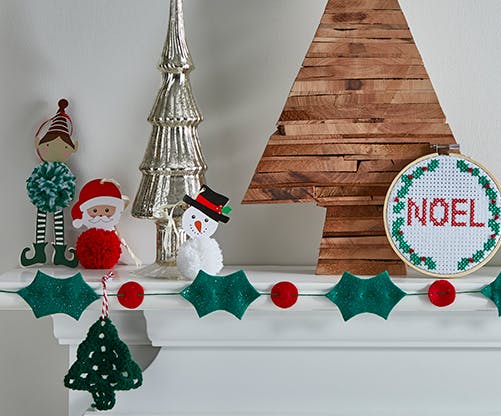
Why not get the whole family involved with these felt and fabric decorations? Easy to make and perfect for all ages, you can choose from our range of kits and make memories along the way as you create these festive trimmings. Whether you go for a characterful felt decoration, wreath, advent calendar kit or all of the above, you’ll be able to create something special that can be used every Christmas. Check out our handy guide below for tips and tricks.
For one and all
Our festive decoration kits can be enjoyed by yourself and those you love, so why not make up one from our range and present it to a friend, family member or colleague at Christmas? Or if they love to craft, these kits make great stocking stuffers, Secret Santa gifts and in-between activities.
Felt Decorations
Materials
- Felt
- Glitter felt
- Embroidery thread
- Baker’s twine or ribbon
- Toy stuffing
- Thick card for templates
Instructions
For the holly hanging decoration
1. Draw out your holly leaf pattern on thick card as well as a circle to use as the berries.
2. Draw around your template on some light green felt and cut out. You will need 2 per decoration.
3. Place these light green leaves on the dark green felt and draw around slightly larger to give a border when they are stitched together. Now you’re ready to cut these larger dark green leaves out.
4. With the embroidery thread, stitch the lighter green leaves to the darker green leaves straight down the middle to look like the leaf vein. Once both leaves are done, place one leaf slightly over the other at one end and stitch together to create your decoration base.
5. Use your small circle template to draw around on some red felt. Cut 2-3 berries for each decoration. Using red embroidery thread, stitch these to the top of your leaves.
6. With a small amount of ribbon or bakers twine create a loop and stitch to the back of your decoration. You are now ready to hang it!
For the holly garland
1. Using the same templates you drew for the holly hanging decorations cut out multiple holly leaves and berries from the dark green and red felt. You will need one more berry than leaves as they sit at both ends of the garland.
2. Figure out how long you would like your garland to be and then cut a length of embroidery thread slightly longer to be able to tie knots in the ends.
3. Tie a knot in one end of the embroidery thread and then stitch through one of your berries before pulling it to the end.
4. Alternate between stitching on the leaves and the berries, making sure you use long stitches to allow the pieces to be able to move easily down the length of embroidery thread.
5. Once you have filled your length of embroidery thread, finish with another berry, tie a knot in the end and use the last berry to cover the knot.
6. Hang your garland and enjoy!
Felt star/heart
1. Using the thick card, draw out a couple of shaped templates that you would like to use, we chose a star and a heart.
2. With your templates cut out 2 hearts.
3. On one of the hearts, draw out a pattern that you would like to stitch, it could be a snowflake, stars or simple lines to follow the outline.
4. Using embroidery thread, follow the design you have created. We split out our embroidery thread and used 2 strands.
5. When you have completed your design, hold your two hearts together, making sure your design is on the outside. Starting at the top of the heart, blanket stich around the edges, leaving a small gap to add some toy stuffing then stitch to the end.
6. Before closing the hole entirely, create a loop from ribbon or bakers’ twine and tie a knot in the ends. Feed the knot into the felt heart then finish stitching to close. This will lock your loop into the decoration.
7. Repeat with different shapes and designs then hang your homemade decorations!
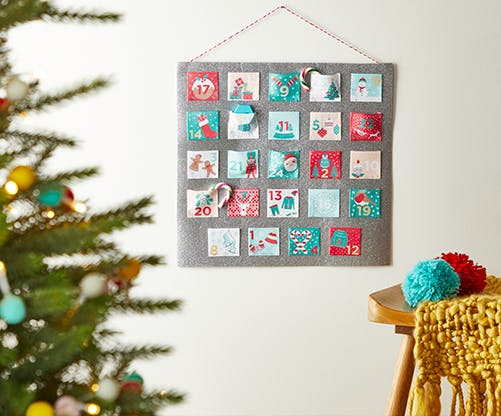
Advent calendar
Materials
- Stiff felt/fabric
- Advent calendar ribbon
- Ribbon or twine
- Sewing machine/needle & thread or a glue gun
Instructions
1. Cut the advent ribbon between each of the numbers and set them aside.
2. Using some stiffer felt or fabric, cut out a rectangle.
3. Figure out where you would like each of the numbers to go on your calendar, they will sit in rows of 5 with the bottom row having 4.
4. Fold over the shorter edges of each of the ribbon numbers and either stitch or glue your pockets onto the felt/fabric background.
5. Add a ribbon or twine loop to the back to hang your calendar.
Alternatively, pick up our new advent calendar kit here
SHOP FABRIC & HABERDASHERY


